Ask Joshua: How High Should a Kitchen Backsplash Go Without Upper Cabinets?
Hi Joshua,
I’m making a few updates to my kitchen and would like to add a backsplash behind my oven. The oven sits against an unusual short wall without any upper cabinets, so I don’t have a natural stopping point for the tile.
Backsplashes typically end at the bottom of the upper cabinets, but how high should one go when there aren’t any cabinets above it?
Thank you,
Bret, Greensboro, North Carolina
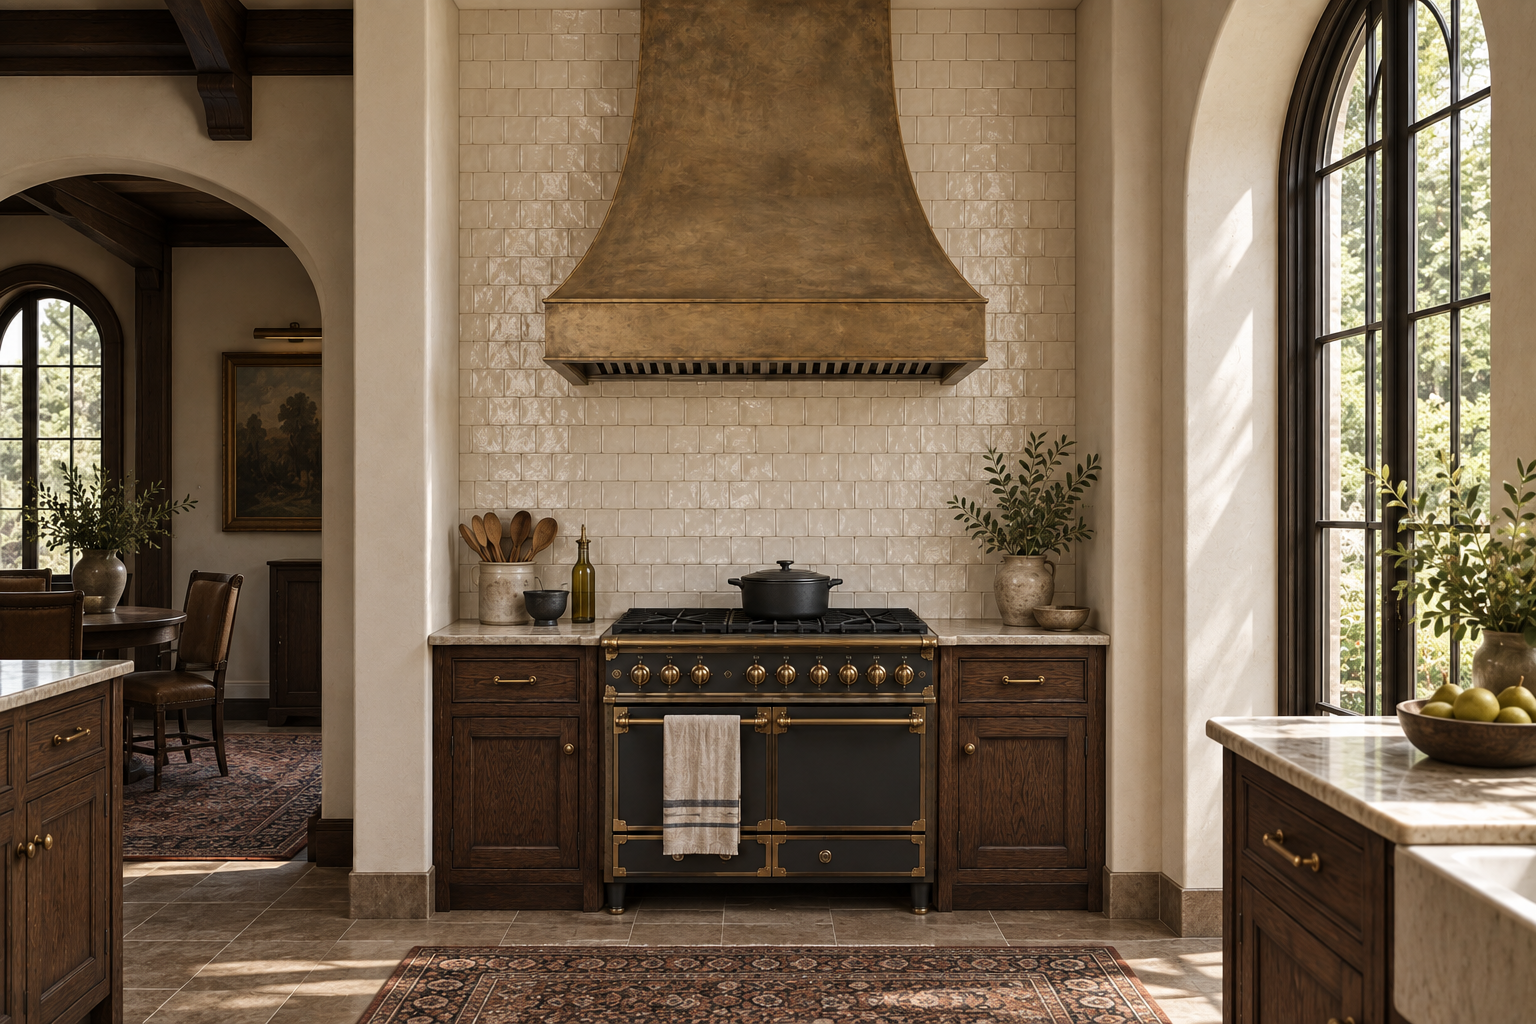
A Tudor-style kitchen with a full-height textured subway tile backsplash, styled by virtual interior designer Joshua Jones of JJones Design Co. This image is an AI-generated rendering.
Hi Bret,
Thank you for reaching out. This is a common design dilemma in kitchens without upper cabinets. When there isn’t a cabinet, shelf, or range hood to create a natural stopping point, ending the tile partway up the wall can make the backsplash feel unfinished.
For your kitchen, I recommend extending the backsplash all the way to the ceiling. Covering the entire short wall will make the backsplash look intentional while turning an awkward architectural feature into a focal point. It will also eliminate the need to choose an arbitrary height at which to stop the tile.
A full-height backsplash can visually draw the eye upward and make the kitchen feel taller. It also provides an easy-to-clean surface behind the oven, where cooking grease and food splatters are more likely to reach beyond the height of a traditional backsplash.
Because the tile will cover a larger area, consider how its color, pattern, and texture will affect the rest of the kitchen. A bold tile can create a beautiful statement, but a detailed pattern may feel overwhelming when extended across an entire wall. If your kitchen already contains several prominent design elements, a quieter backsplash may create better balance.
A classic subway tile, handmade-look ceramic tile, or lightly textured neutral tile can add interest without dominating the room. You can also use a tile with subtle color variation to give the wall more depth while maintaining a timeless appearance. If you prefer something more dramatic, the short wall could be an ideal place to introduce color or pattern because the tile will remain contained within one defined area.
The exposed edges of the backsplash will also need careful consideration. If the tiled wall ends at an outside corner, use finished-edge tiles, a coordinating trim piece, or a slim metal profile to create a clean transition. Planning this detail before installation will prevent the backsplash from looking abruptly cut off.
Before selecting the tile, bring a few samples into the kitchen and view them throughout the day. Natural and artificial lighting can significantly change how a tile’s color, finish, and texture appear. A glossy tile will reflect more light, while a matte or handmade finish can give the wall a softer appearance.
You should also review the oven manufacturer’s installation requirements and any applicable building or fire-safety requirements with your contractor. Tile provides a durable, noncombustible surface, but it does not replace the required clearances or ventilation around a cooking appliance.
Without upper cabinets to establish a stopping point, taking the backsplash to the ceiling is usually the cleanest solution. It will make the unusual wall feel purposeful and give your kitchen a more complete, thoughtfully designed appearance.
I hope this helps with your kitchen renovation!
Warmly,
Joshua
Have interior design related questions? You can ask Joshua here.