
Room Measurement Guidance
This guide explains how to measure your room accurately before starting a design project. Clear measurements help ensure furniture layouts, floor plans, and design concepts are created correctly, making the virtual interior design process smoother for both you and your designer.
This simple guide will show you how to measure your room and create a basic floor plan that your interior designer can use to plan furniture layouts and space planning accurately.
How to Measure a Room for Interior Design
Having trouble and not sure how to measure your space properly? No worries, we can help you draw a basic floor plan. We'll do it in steps to help you to get it right. Before we start with this process - there are few things that you will need in order to get started.
What you need to measure your space:
8 x 11 white paper
Measuring Tape
Black Pen
Ruler or any ruler like object to help you to draw straight
If your space is large, you will need a second person to help you
Wait! What about these cool apps that will take measurements for you? Unfortunately, I have tested all the popular measuring apps and found them inaccurate. While programmers work on advancing measuring app technology, we'll stick with the good old fashioned measuring tape for now.
If you feel that you can't draw well, don't worry! There are tools to help you draft a simple floor plan; websites like Icovia or Home Styler. You will still need to do the measuring yourself however!
Step-by-Step Guide to Measuring Your Room
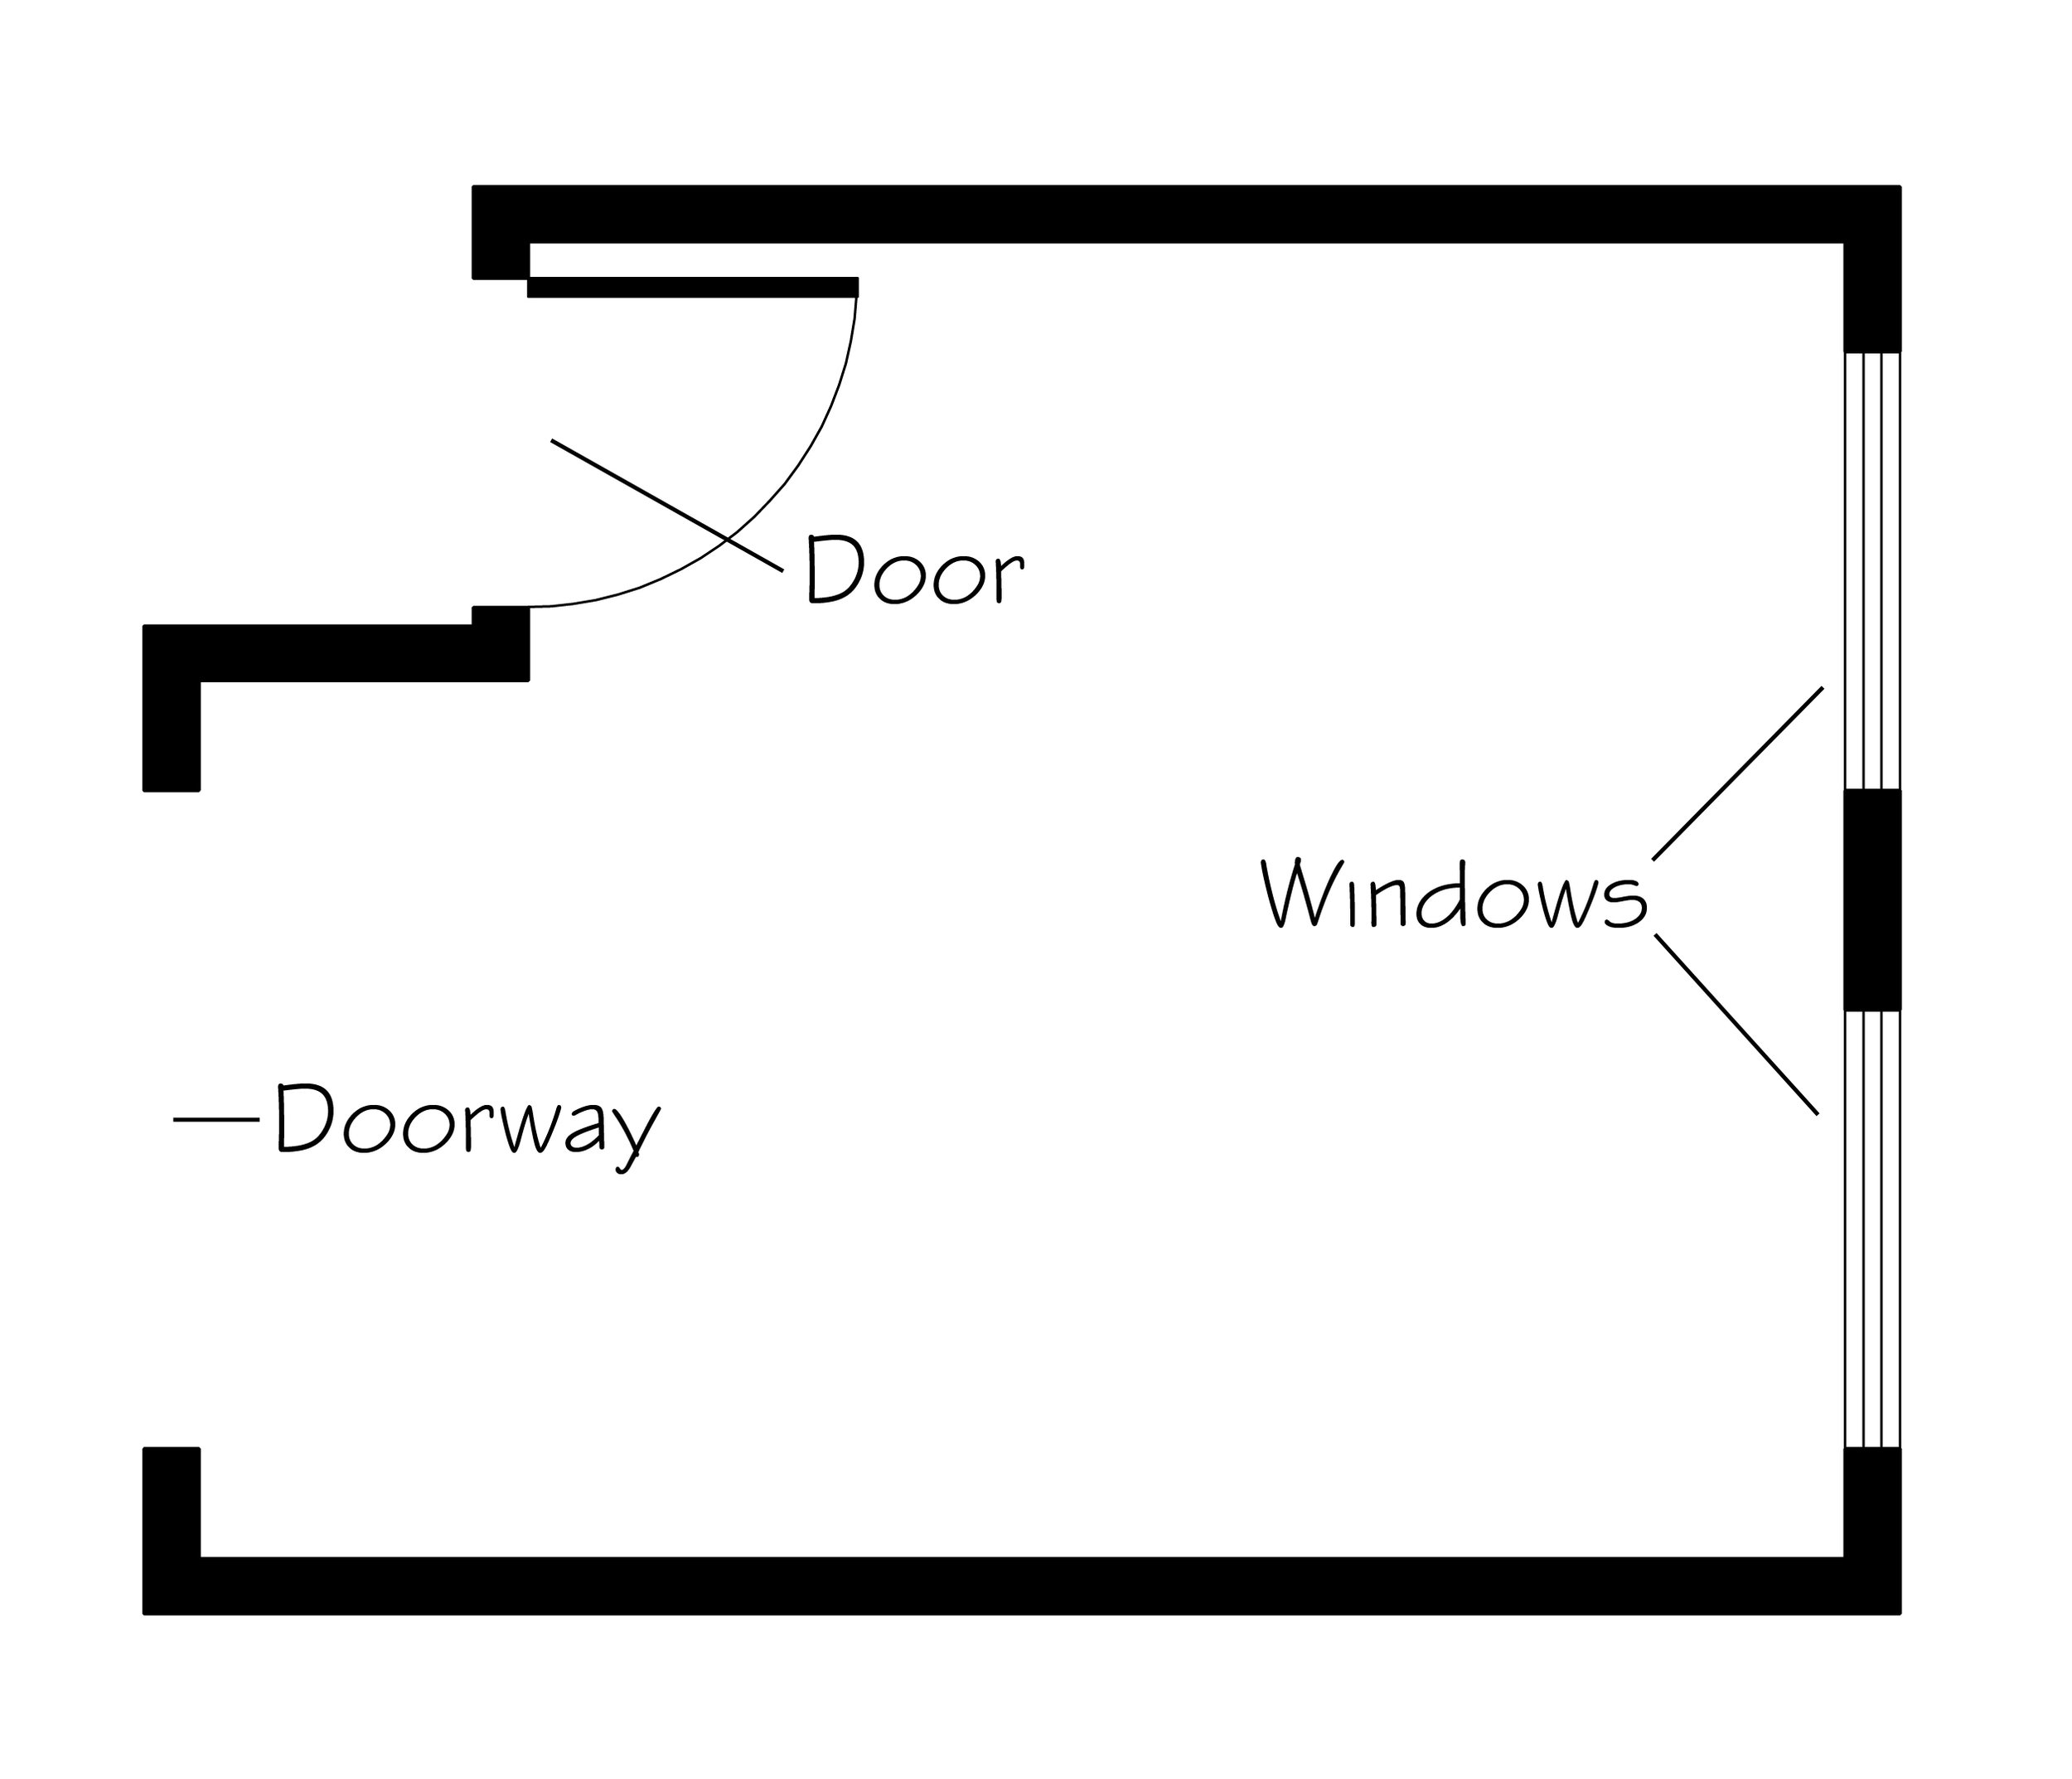
Step 1: Drawing the floor plan
When you are drawing the floor plan - please include all doors, windows, and doorways. We will discuss measuring these later in the tutorial. You can see how a basic floor plan drawing should look like below here.
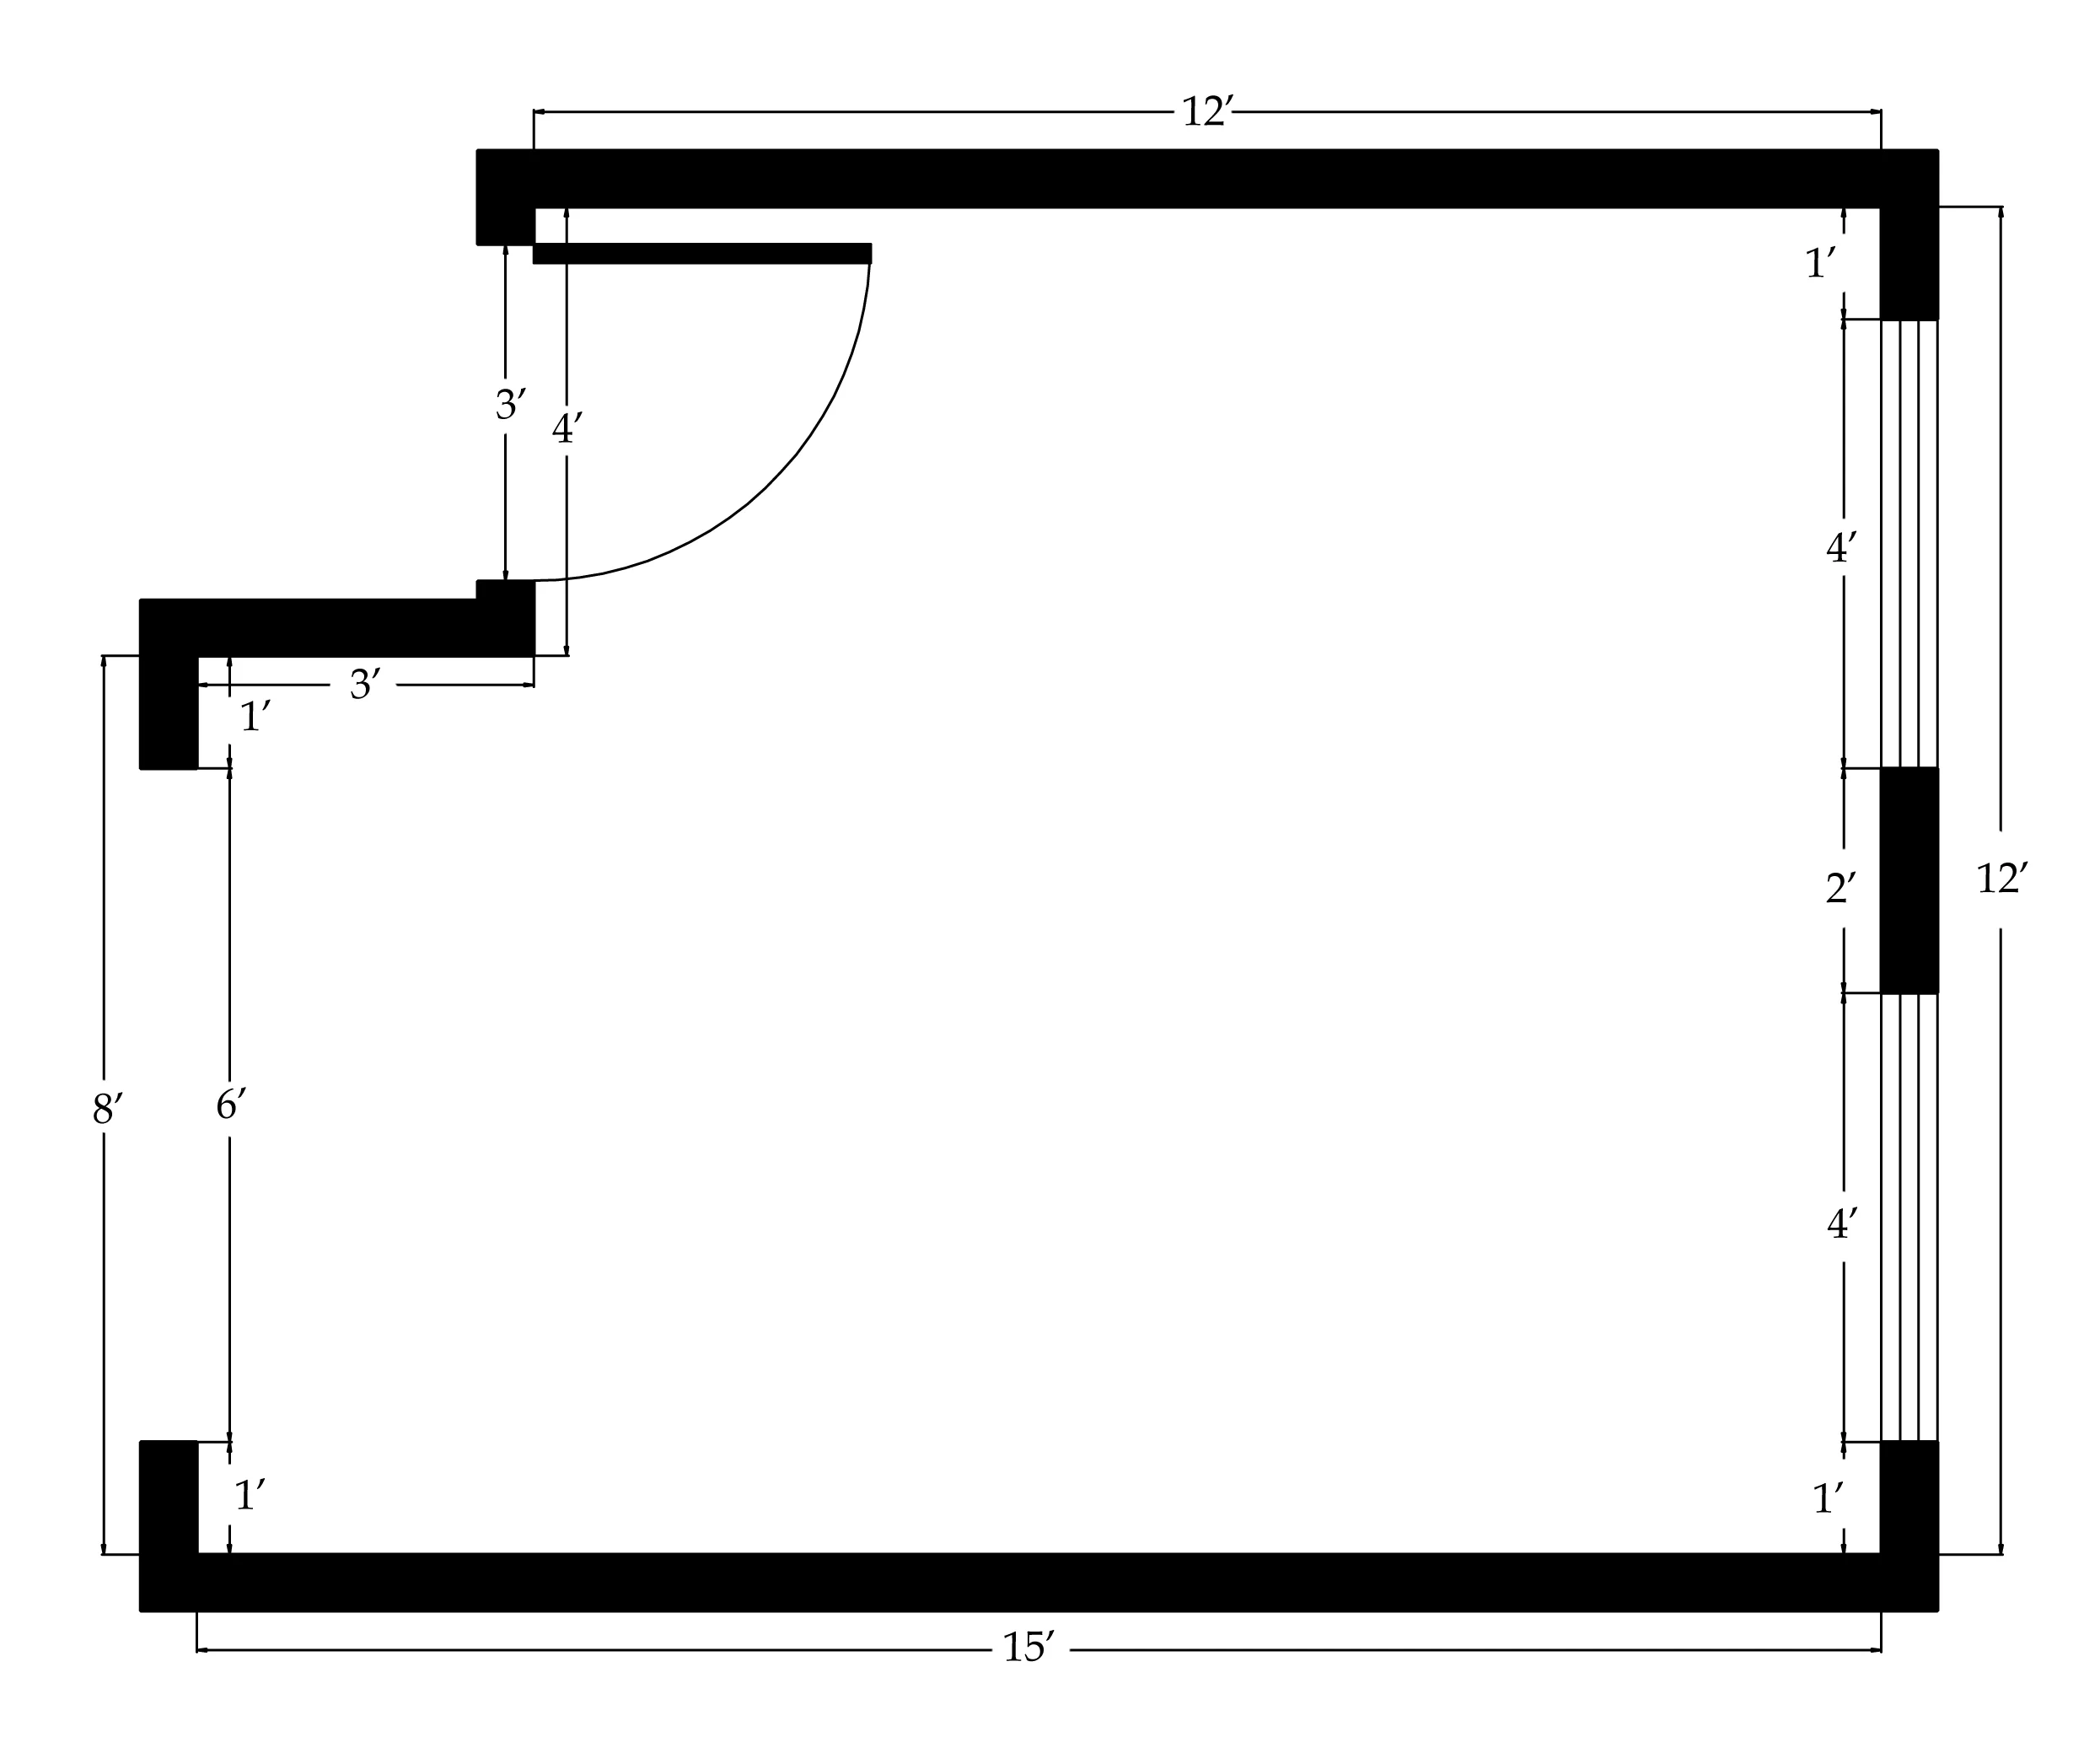
Step 2: Overall measurements
It is important to do the overall measurement, outer dimensions, of the space first because it will help to ensure you measure everything else correctly. Below is an example of what overall measurements look like. You can write either all in inches or feet/inches or even metric is fine if that's your preference. Notice that walls have depth, so while my markings are on the outside of the room, I've taken the measurements of inside the room.

Step 3: Measuring the details
Measure the doors, windows, and doorway. Please note that you don't include door or window frames - only measure from where the actual window (glass) and door begins and ends. You can see the examples below. Please double check to make sure these measurements are correct by add up all detailed measurements on each wall to make sure the number is equal to the overall measurement. If it doesn't add up right which means you probably measured something wrong. This double checking helps to make sure all your measurements add up.
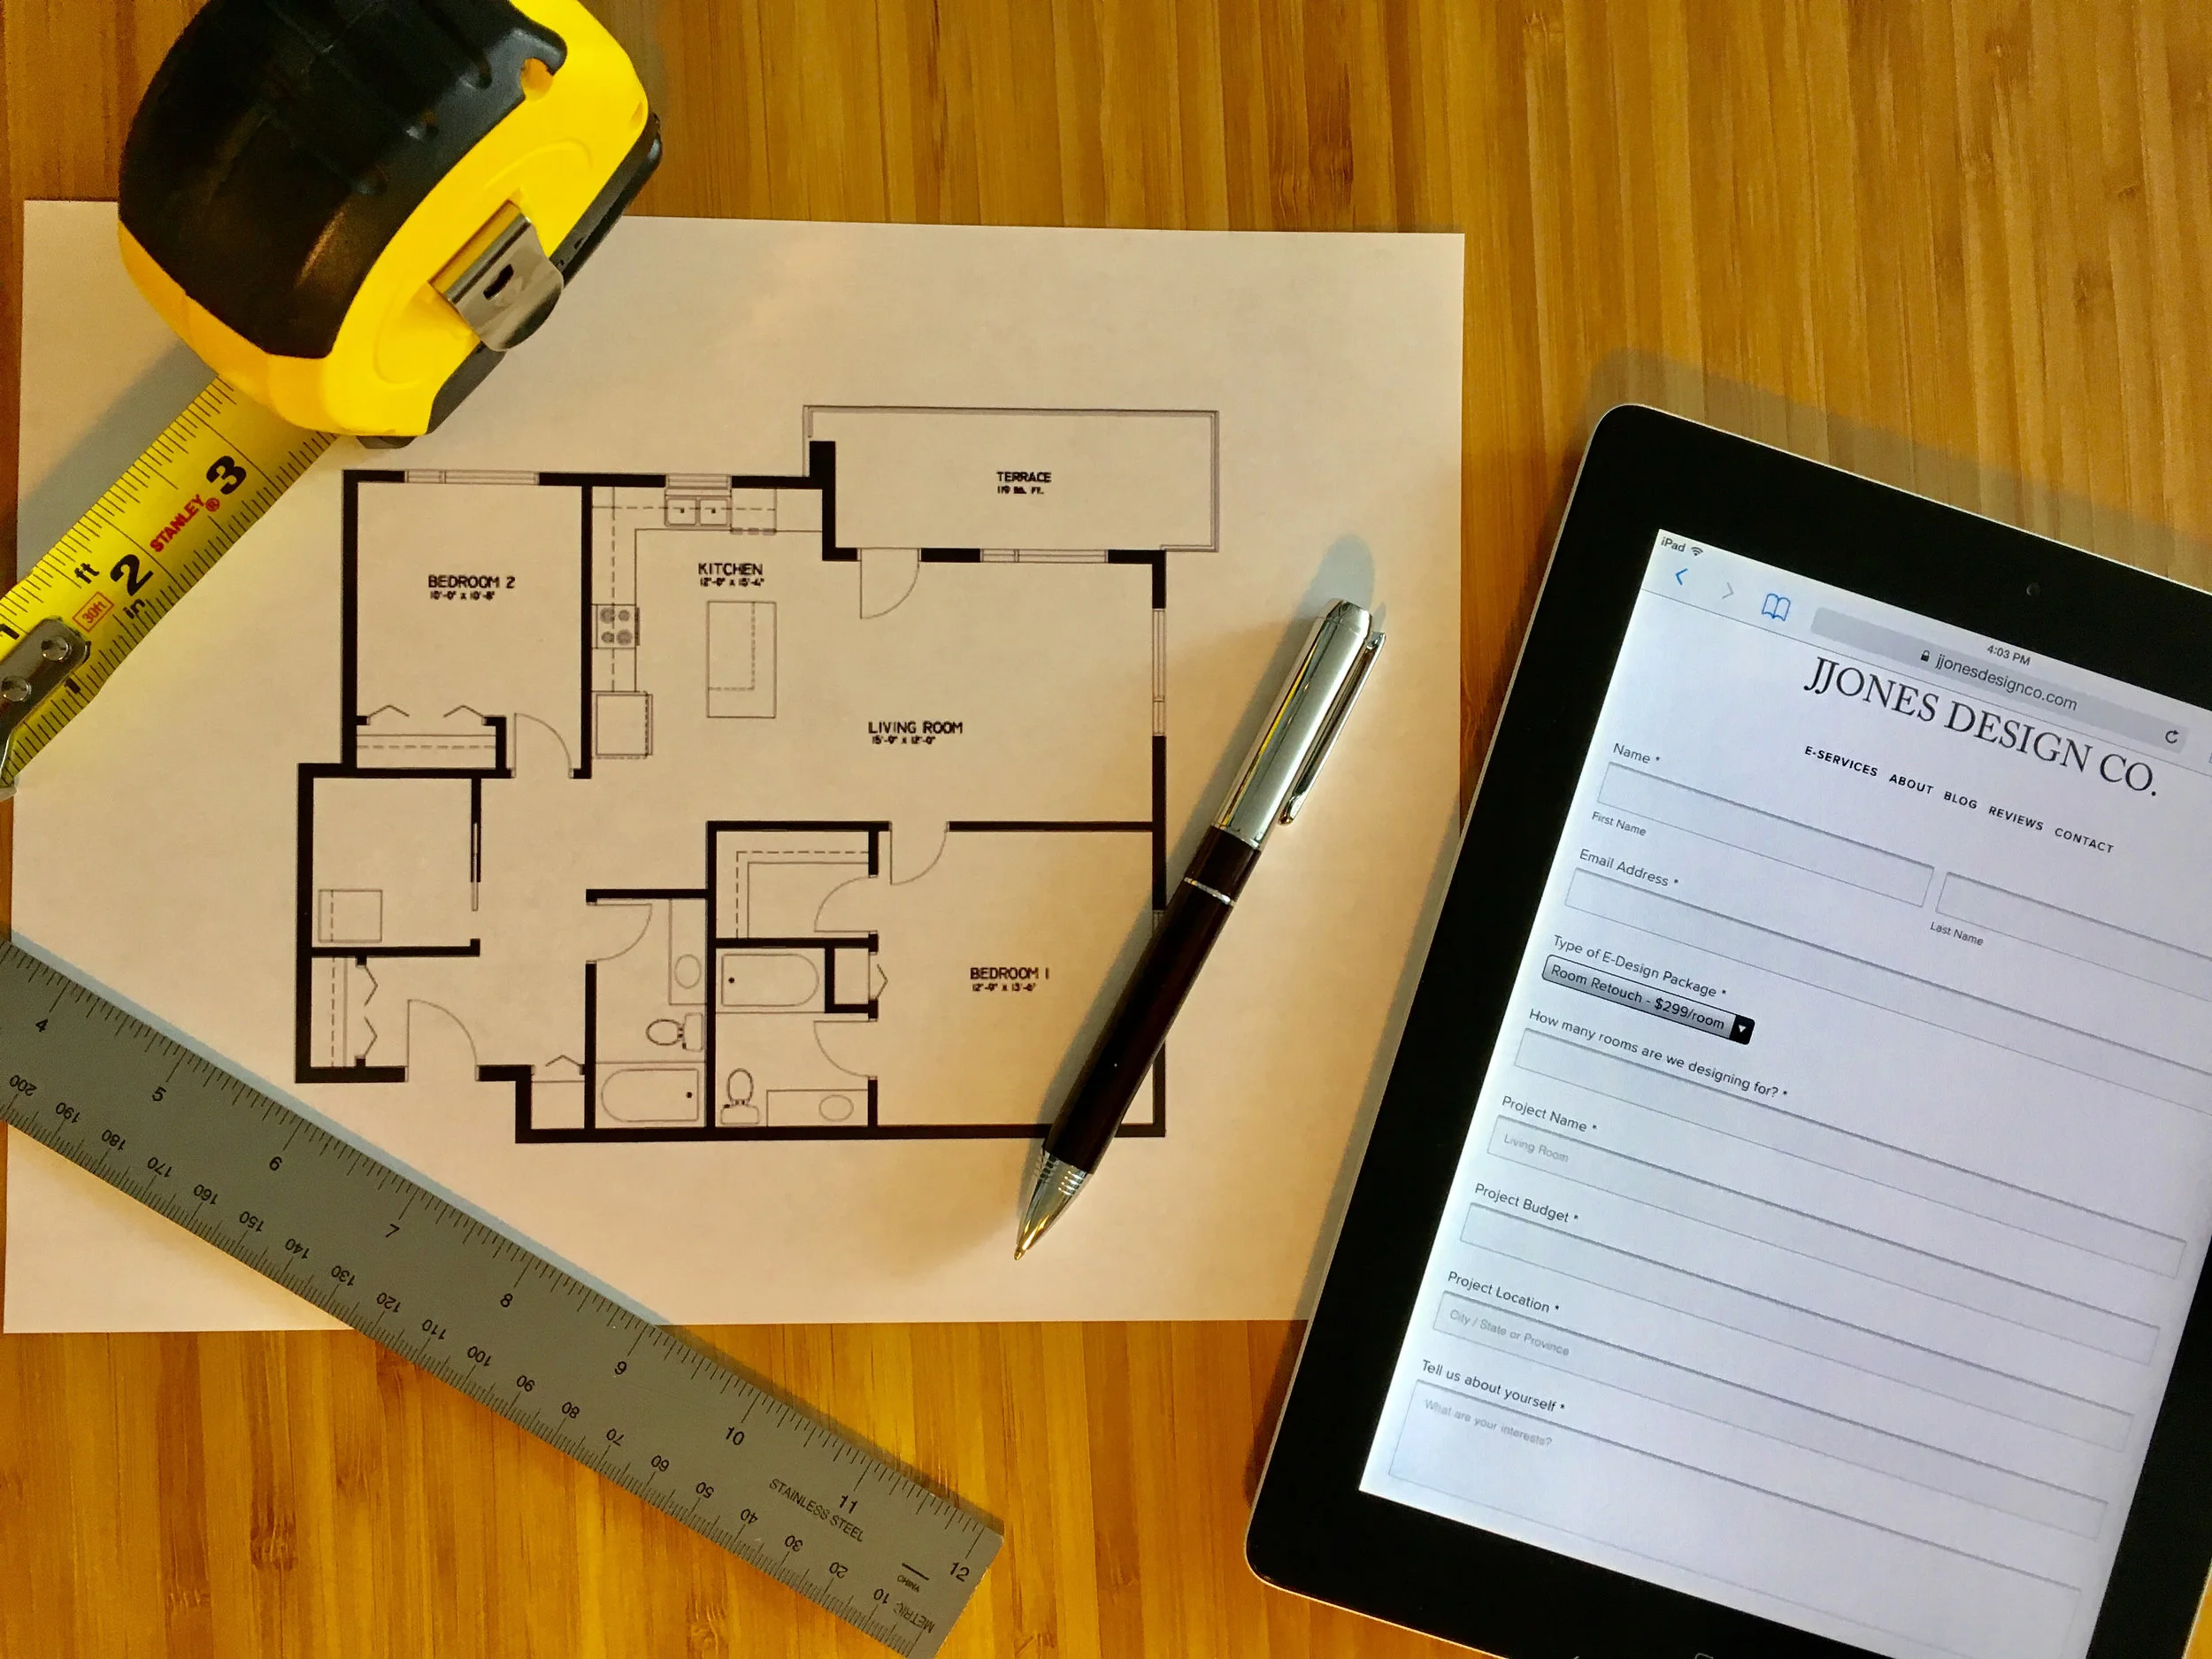
Step 4: Photograph Your Floor Plan
Once you’ve finished drawing your floor plan and adding the measurements, use your smartphone or tablet to take a photo of it so you can send it to us to get started on your project. If your space includes additional features such as stairs, bay windows, curved walls, or niches, we will work with you to determine the best way to measure those areas since they can be a bit more complex.
When you're ready, you can explore our Virtual Interior Design Services to begin your project.