Small-Space Christmas Decorating Ideas That Won’t Make Your Home Feel Cluttered
You want your home to feel festive, but where is the Christmas tree supposed to go? The corner already has a chair you use every day, the shelves are full, and moving furniture might mean squeezing sideways to reach the sofa. In a small home, finding room for holiday decorations can take a little creativity.
As an interior designer, I approach seasonal decorating with the same question I ask when planning a room: how can we make this space feel beautiful while keeping it comfortable to live in? I want you to enjoy the glow of Christmas lights and display the ornaments you love while still having somewhere to set your coffee or sit with a guest.
A garland arranged into a Christmas tree on the wall might be the answer when there’s no floor space to spare. A tall, narrow tree could fit a spot that a fuller tree would overwhelm. Your existing bookshelves and framed artwork offer other opportunities to bring in the season without adding furniture or filling every available surface.
In my guide to decorating your home for the holidays, I cover the broader decisions that help a seasonal look feel connected to your home. Here, we’ll focus on creative Christmas decorating ideas for small spaces, with practical guidance on where to put them and how to style them.
Whether you live in a studio apartment, a compact house, or simply have a small living room, let’s find a way to make it feel like Christmas while leaving room for everyday life.
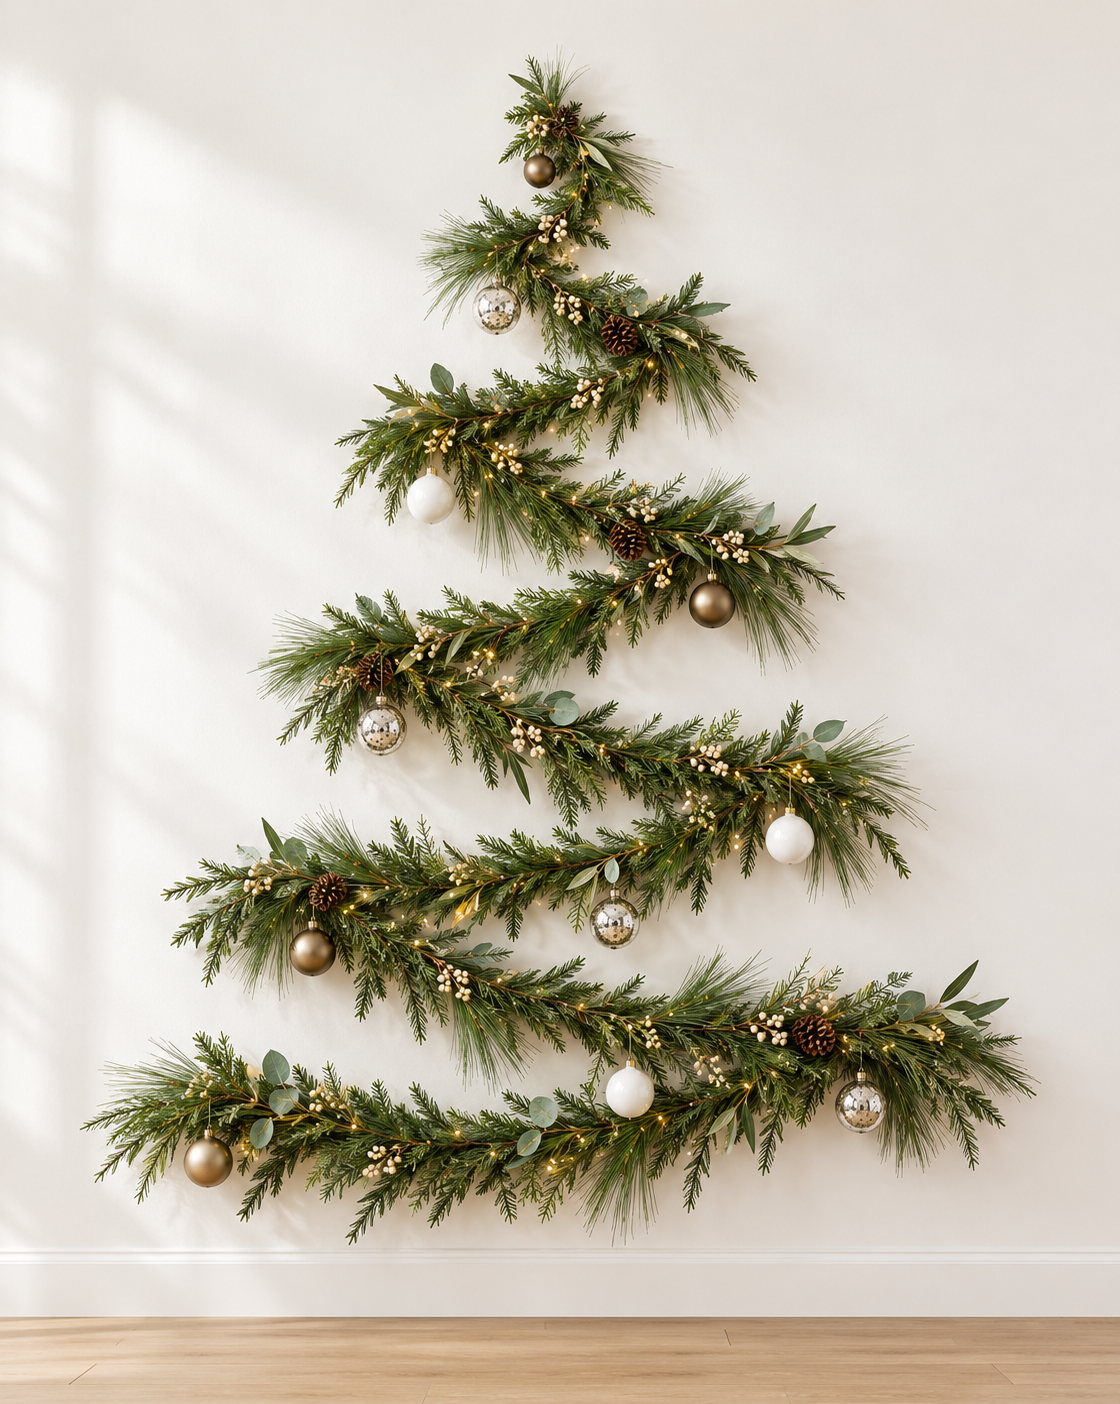
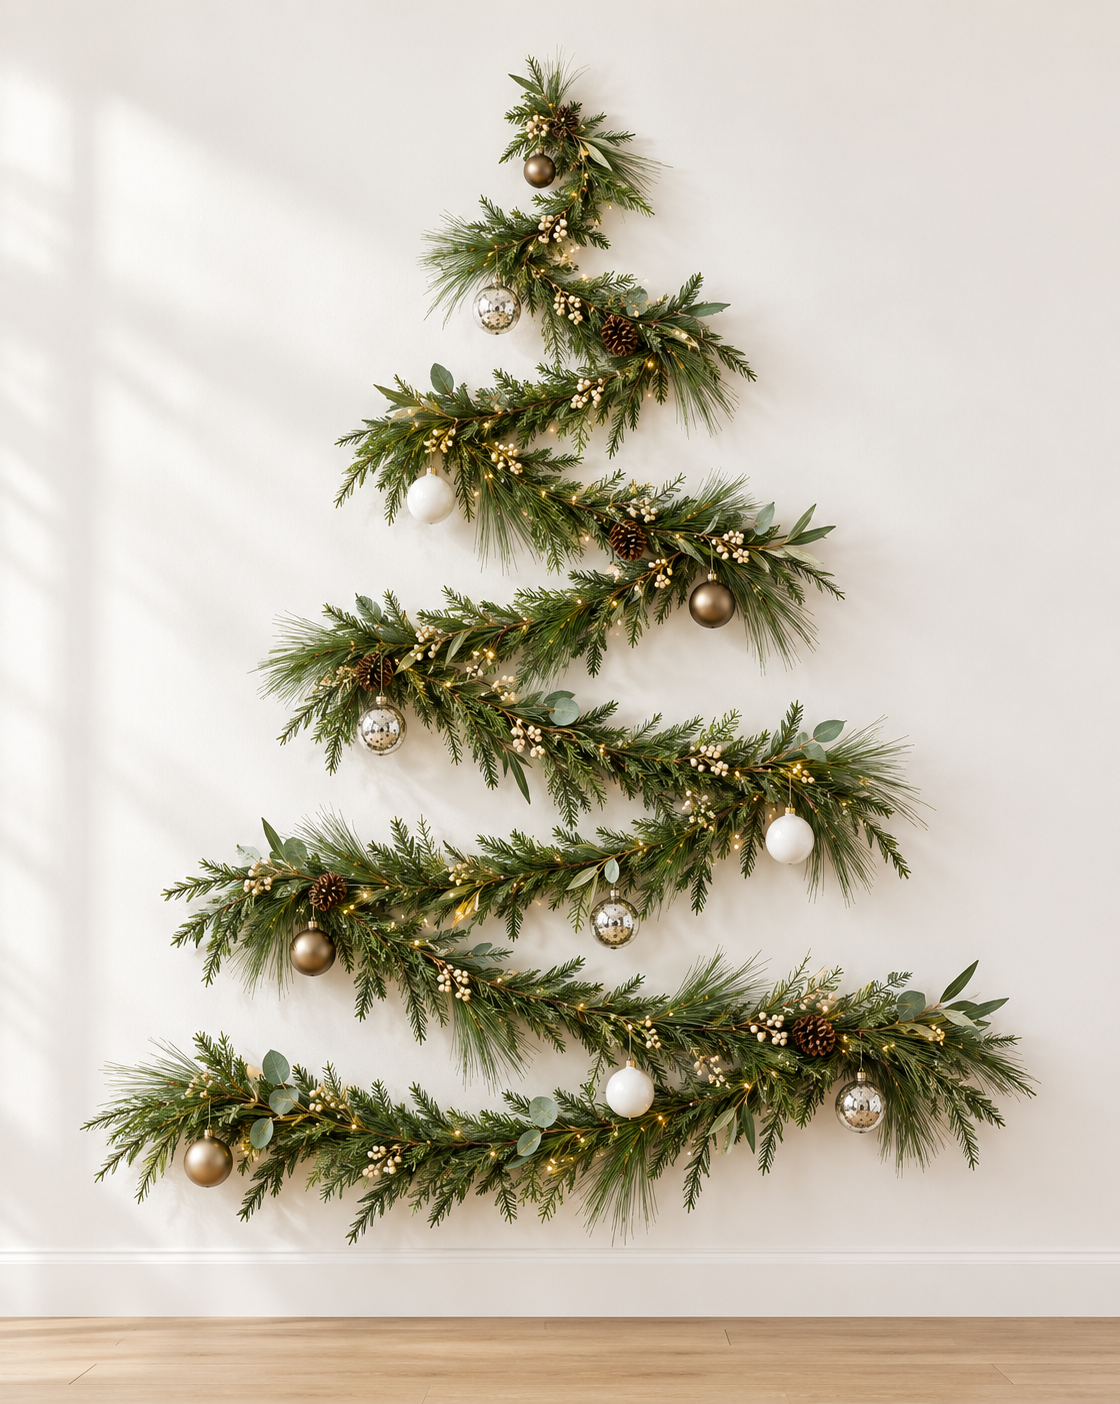
A zigzag garland tree brings Christmas greenery, warm lights, and bronze, mercury-glass, and glossy white ornaments to a small space while keeping the floor clear. AI-generated image styled by virtual interior designer Joshua Jones of JJones Design Co. to illustrate this blog’s decorating ideas.
1. No Room for a Christmas Tree? Create One on the Wall With Garland
If a traditional Christmas tree would block a walkway or crowd your seating area, take a look at your walls. A garland tree gives you a place to hang ornaments and enjoy Christmas lights while leaving the floor available for everyday life.
My favorite part of this idea is that you can give it real presence. You don’t have to settle for a tiny decoration just because your room is small. A generous tree outline on an open wall can become the main holiday feature in the room.
Choose a Wall Where the Shape Can Stand Out
Look for a stretch of wall where you can see the entire tree shape, such as beside a dining table or above a low cabinet. You might temporarily take down a piece of artwork to make room, then put it back after the holidays.
Before hanging anything, use a tape measure to plan the height and width. Leave space around the outline so it feels comfortably placed, and check that the lower branches won’t interfere with chairs, doors, or anything you regularly reach for. If you plan to add lights, consider how the cord will reach an outlet without crossing a walkway.
Shape the Garland Into a Tree
There are two approaches I’d consider:
A simple triangular outline: Run garland up one side, down the other, and across the bottom. This creates an open center where you can hang a few ornaments from separate hooks.
A zigzag tree: Arrange one continuous garland in horizontal sweeps that become progressively wider toward the bottom. This gives the tree more greenery and places to attach decorations.
Choose lightweight faux garland that bends easily. A thick, heavily decorated garland can be difficult to shape and may project farther into the room than you expect.
Lay out the design on the floor first to check the proportions and how much garland you need. Then plan your hook positions so the garland is supported at each turn and wherever it needs additional support.
Hang It Without Making Holes in the Wall
If you’re concerned about putting holes in your walls, removable adhesive hooks with stretch-release strips may be a good option. Choose hooks rated for your wall surface and the weight they’ll support, including the garland, lights, and ornaments. Follow the installation instructions, including any waiting period before hanging decorations.
Check the packaging before buying: some adhesive hooks aren’t suitable for wallpaper, delicate finishes, or textured walls.
After the holidays, take down the decorations and follow the manufacturer’s removal directions. For stretch-release strips, this usually means holding the hook gently and slowly pulling the exposed tab straight down along the wall—not outward toward you. Leave the tabs accessible when decorating so you can reach them later. Proper installation and removal help reduce the risk of paint damage, though the result depends on your wall finish and the product you use.
Give It the Same Attention You’d Give a Full Tree
I’d weave in a light strand approved for indoor use, then add a small selection of lightweight ornaments. Repeat a few colors or materials to help the arrangement feel cohesive, and leave some greenery visible between decorations.
You can absolutely include sentimental ornaments. Place your favorites where you’ll notice them, provided they’re light enough for the garland and securely attached. For heavier or fragile pieces, a nearby shelf may be a better display spot.
Finish the top with a lightweight star or bow. Keep larger ornaments toward the wider lower portion so the arrangement follows the tree’s shape.
If you’re wondering whether you need presents beneath it to complete the look, you don’t. The greenery, lights, and ornaments can carry the display on their own. That’s especially useful when the reason you chose a wall tree was to keep the floor clear.
Shop Garlands for a Wall Christmas Tree
For this project, I’d look for lightweight, flexible garland that’s easy to bend into shape. I’ve gathered options in the digital shopping list below so you can find a style that suits your home. Measure your planned outline or zigzag arrangement before ordering; the amount you need will depend on both the tree’s size and how you shape it.



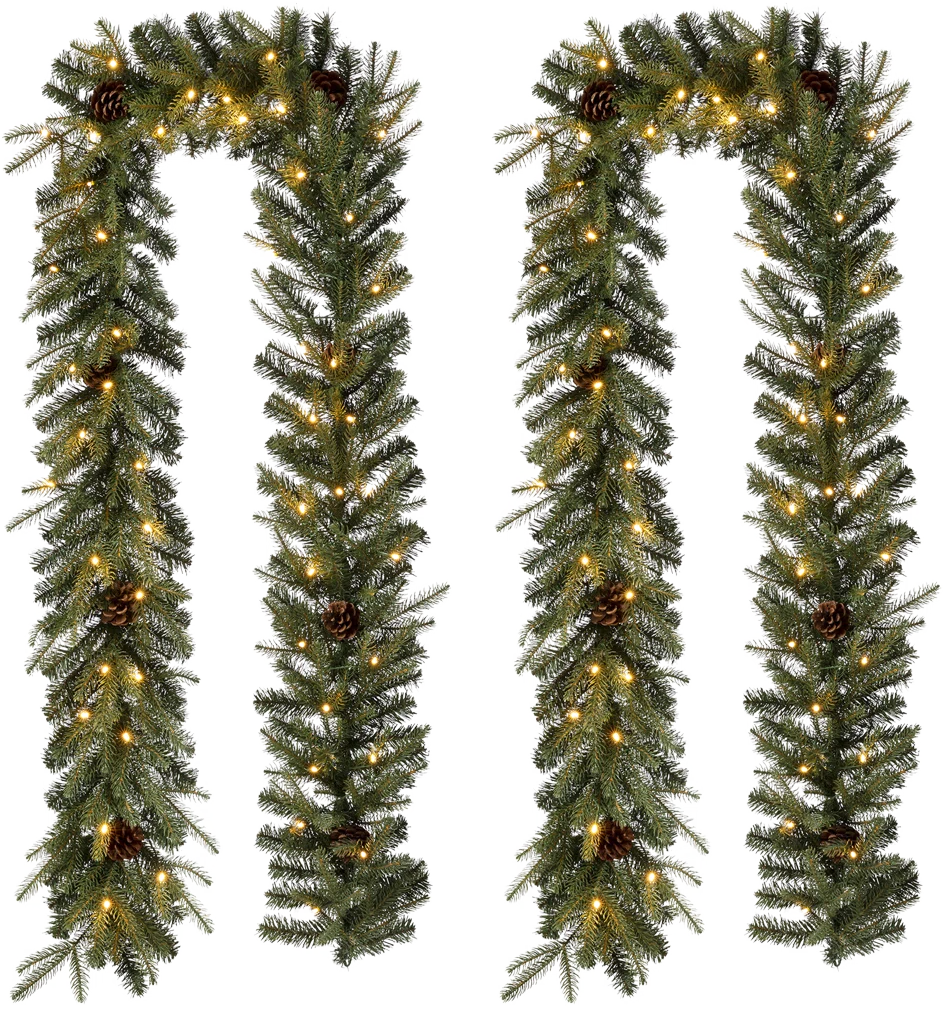


The shopping list contains affiliate links. If you purchase through them, I may earn a small commission at no additional cost to you.
Where this works best: A studio apartment, a small dining area, or a living room with an open wall but no practical spot for a freestanding tree.
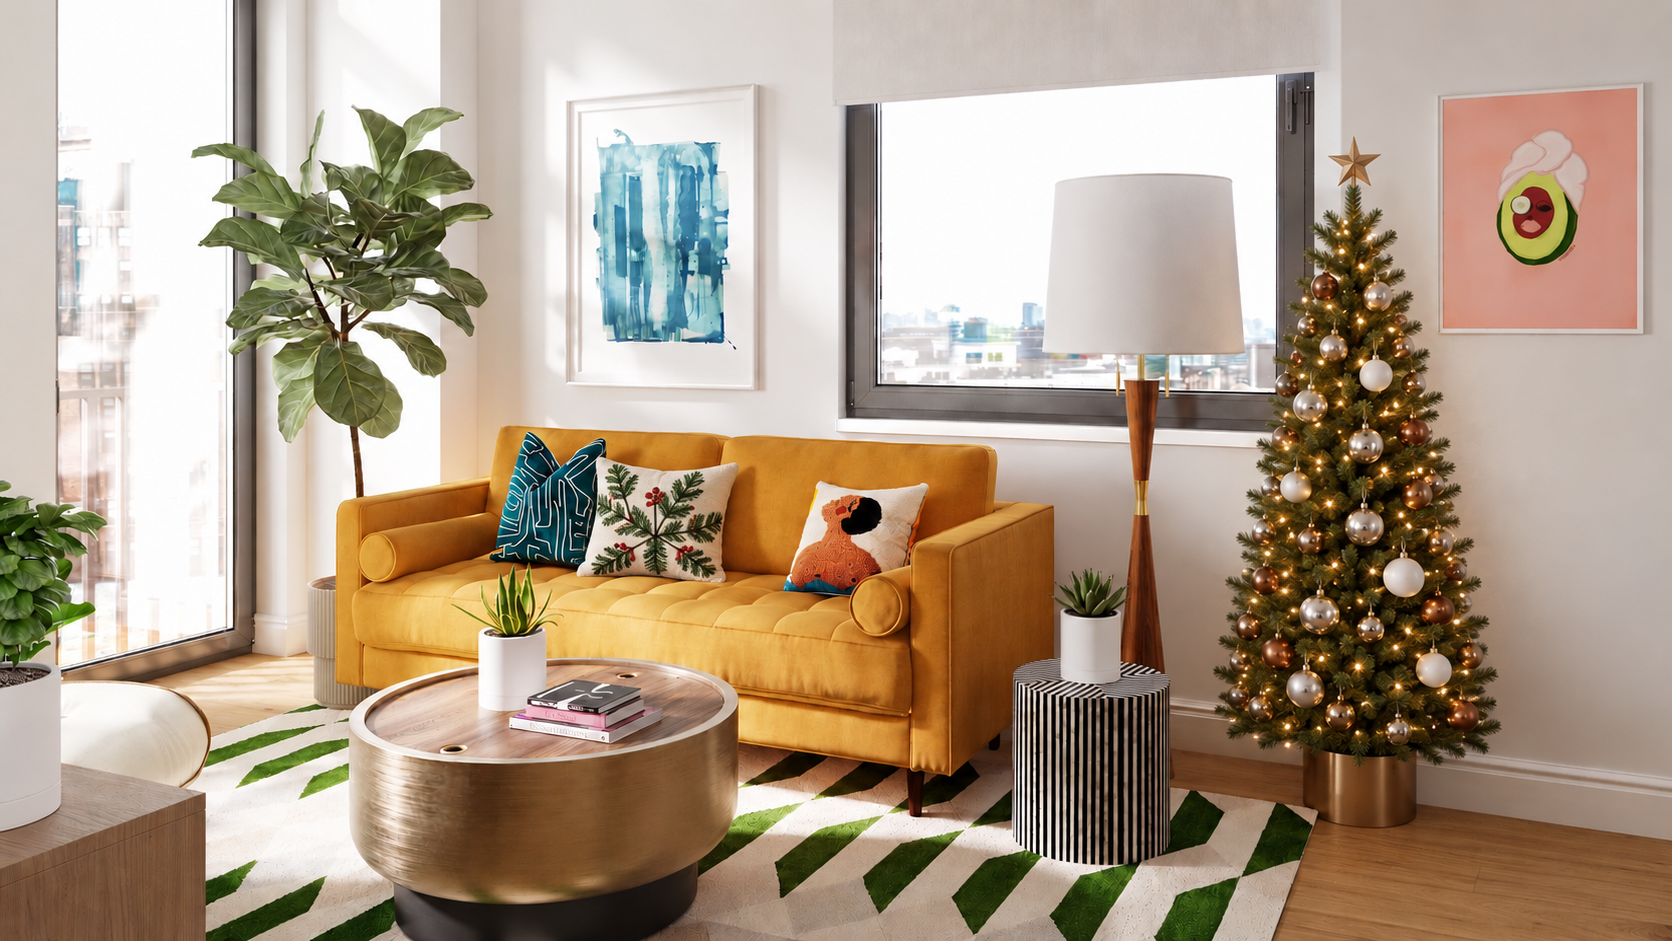
A slim Christmas tree and a seasonal pillow bring holiday warmth to this small NYC living room designed by virtual interior designer Joshua Jones of JJones Design Co. The photorealistic 3D rendering was adjusted using AI to illustrate simple holiday decorating ideas for this blog post.
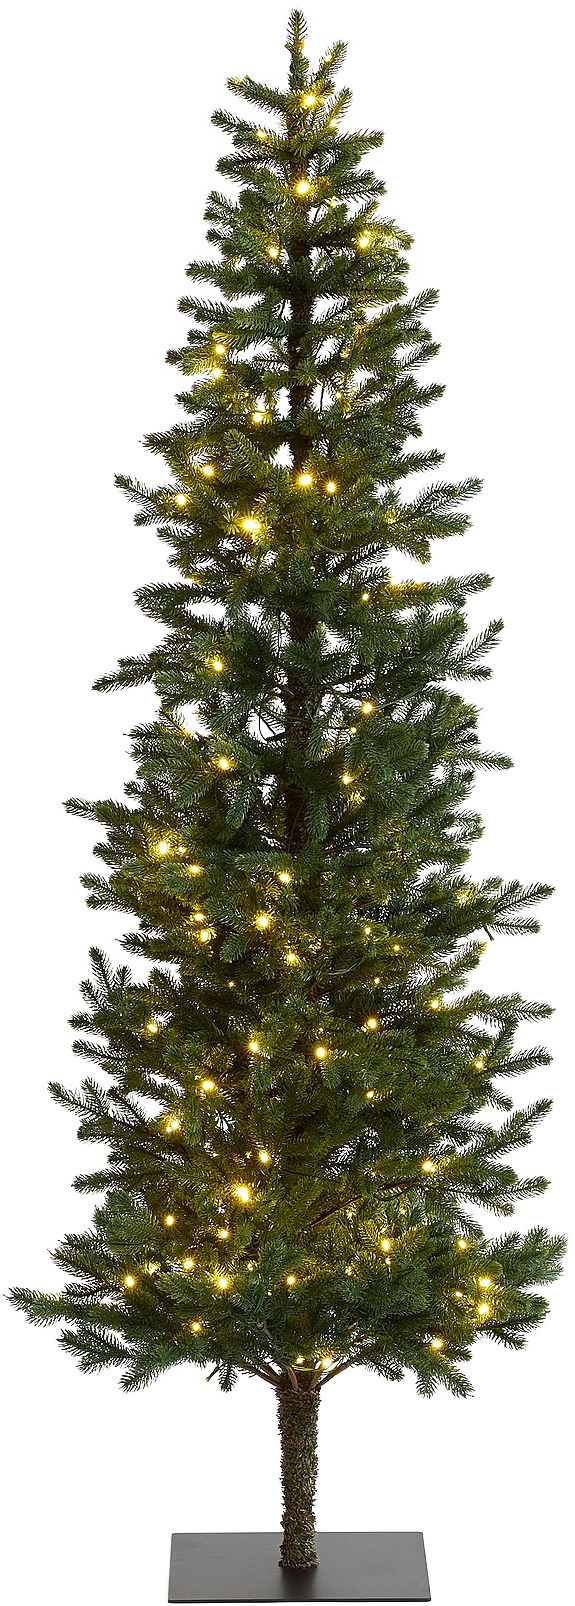
2. Have a Narrow Spot? Choose a Tall, Slim Christmas Tree
Sometimes there’s room for a Christmas tree, but the usual wide shape is what causes the problem. Its lower branches reach into the walkway, press against the sofa, or take over the spot where you normally pull out a dining chair.
A tall, slim Christmas tree can be a beautiful solution. You still get the height, lights, and ornaments of a freestanding tree, with a narrower footprint that’s easier to work into the room.
I’d consider this option if you enjoy decorating a traditional tree and have a small corner or stretch of floor available. The key is choosing a tree that fits that particular spot.
Measure the Width Before Choosing the Height
When shopping for a tree, it’s easy to focus on how tall it is. In a small room, I’d check the widest diameter and the stand dimensions first.
Measure the available space, then check it against the tree’s listed dimensions. Allow room for ornaments that hang beyond the branches, and make sure the stand fits entirely within the space you’ve set aside. Labels such as “slim” and “pencil” can help narrow your search, but the actual measurements matter more than the name.
You can use painter’s tape suitable for your flooring to mark the proposed footprint, or lay out a piece of paper or cardboard cut to size. Leave it there while you move around the room. Can you still open the door, pull out a chair, and walk past comfortably? This quick check can save you from ordering a tree that technically fits but makes daily life awkward.
Once you know the width works, choose the height. Remember to account for your topper and the clearance above it. My Christmas tree height guide can help you work out the proportions before you buy.
Find a Spot That Keeps the Room Comfortable
A corner beside a low cabinet or at the end of a seating arrangement may work well, provided the tree doesn’t interfere with access. Check the placement from both a seated position and the routes you use through the room.
I wouldn’t squeeze a tree into the gap between two pieces of furniture just because the base fits. If the branches brush against you every time you sit down, the placement will become frustrating quickly.
You might temporarily remove a decorative basket or plant stand to make room. I’d be more cautious about moving a lamp or side table you rely on every evening. Holiday decorating should still leave you with a room you enjoy using.
Follow the tree and lighting manufacturers’ placement instructions, keep it away from heat sources, and plan a cord route that stays clear of walkways.
Decorate for the Tree’s Narrow Shape
A slim tree doesn’t need tiny ornaments from top to bottom. I like a mix of sizes, with larger pieces placed selectively where the branches can support them. Too many oversized ornaments can hide the greenery and make the narrow silhouette feel crowded.
If you use ribbon, try shorter sections tucked among the branches rather than thick bands wrapped tightly around the tree. This adds movement while letting the shape remain visible.
For the topper, consider its width and weight as well as its style. A broad, heavy topper may overwhelm a delicate pencil tree or be difficult to secure. My guide to stylish Christmas tree toppers offers different shapes and materials to consider; check each option’s dimensions against your tree.
Shop Slim Christmas Trees
I’ve gathered slim Christmas tree options in the digital shopping list below. Compare the listed diameter, stand size, and height with your measurements before choosing one. If it’s pre-lit, check the light color and settings, too—you’ll want a glow you enjoy living with throughout the season.





The shopping list contains affiliate links. If you purchase through them, I may earn a small commission at no additional cost to you.
Where this works best: A small living room or dining area with a narrow spot that can accommodate a tree while keeping doors, seating, and walkways accessible.

Framed winter photography and glass and carved wood Christmas trees turn existing oak shelves into a seasonal display against a black wall. AI-generated image styled by virtual interior designer Joshua Jones of JJones Design Co. to illustrate this blog’s decorating ideas.
3. Turn Your Existing Shelves Into a Holiday Display
If your floor space is already spoken for, your bookshelves may offer the perfect place to decorate. A bookcase, floating shelf, or wall-mounted shelving unit can hold a festive display without bringing another piece of furniture into the room.
The trick is to make room within the arrangement you already have. If you add Christmas decorations in front of every book and accessory, the shelves can quickly become crowded—and difficult to use.
I’d start by choosing one or two areas to change. You can give those spots a seasonal refresh while letting the rest of the shelving carry on doing its everyday job.
Swap a Few Pieces Instead of Adding Another Layer
Take a look at what’s on your shelves. Could a small ceramic Christmas tree replace a vase? Could a framed seasonal print take the place of a photograph for a few weeks? A shallow bowl of ornaments might fit where you normally display a decorative object.
Put the everyday accessories you remove into the holiday storage box you’ve just unpacked. That keeps them together and makes it easy to switch everything back afterward.
Keep books you regularly reach for accessible, and leave cabinet doors, drawers, and electronics unobstructed. You shouldn’t have to dismantle a holiday arrangement every time you want to read a book.
Create One Arrangement With Room Around It
You don’t need to decorate every shelf. I often find that a single well-composed grouping draws more attention than little decorations scattered throughout an entire bookcase.
For example, try a framed winter print toward the back, a small sculptural tree beside it, and a shallow bowl holding a few favorite ornaments in front. The different heights give the arrangement depth, while the open space around it helps each piece stand out.
Use the shelf’s dimensions to guide your choices. A deep bookcase can accommodate overlapping pieces; a narrow floating shelf may only need a leaning print and one small object. Check that everything sits securely within the shelf rather than hanging over its edge.
If you collect holiday villages or figurines, choose a shelf for a few favorites. Giving them a defined home can make the collection feel more special than spreading it across every available surface.
Add Greenery Without Covering Everything
A short length of garland can soften the edge of a shelf or frame a section of a bookcase. I’d keep it away from the spots where you need to reach for books or open doors, and secure it so it won’t slide down when something is moved.
You can also tuck a few faux evergreen sprigs into an existing vase. This is a useful option when a full garland would overwhelm the shelving.
Let the proportions of your bookcase guide you. On a small unit, one touch of greenery may be enough. On larger built-ins, you might repeat it in two or three places to connect the display.
Make Your Favorite Ornaments Part of the Display
Shelves can also give ornaments a place to shine when you aren’t putting up a tree. Display a few in a shallow bowl, or use individual ornament stands for pieces you’d like to see upright.
I’d choose a contrasting background so their details are visible. A pale ornament can disappear against a white shelf, while a darker book cover or small piece of artwork behind it can help it stand out.
For fragile ornaments, choose a stable spot away from the shelf’s edge and anywhere they could be knocked over by children or pets. That way, you can enjoy the pieces that matter to you throughout the season.
Where this works best: A living room with bookshelves, a dining area with open shelving, or an apartment where existing wall storage offers more decorating room than the floor.
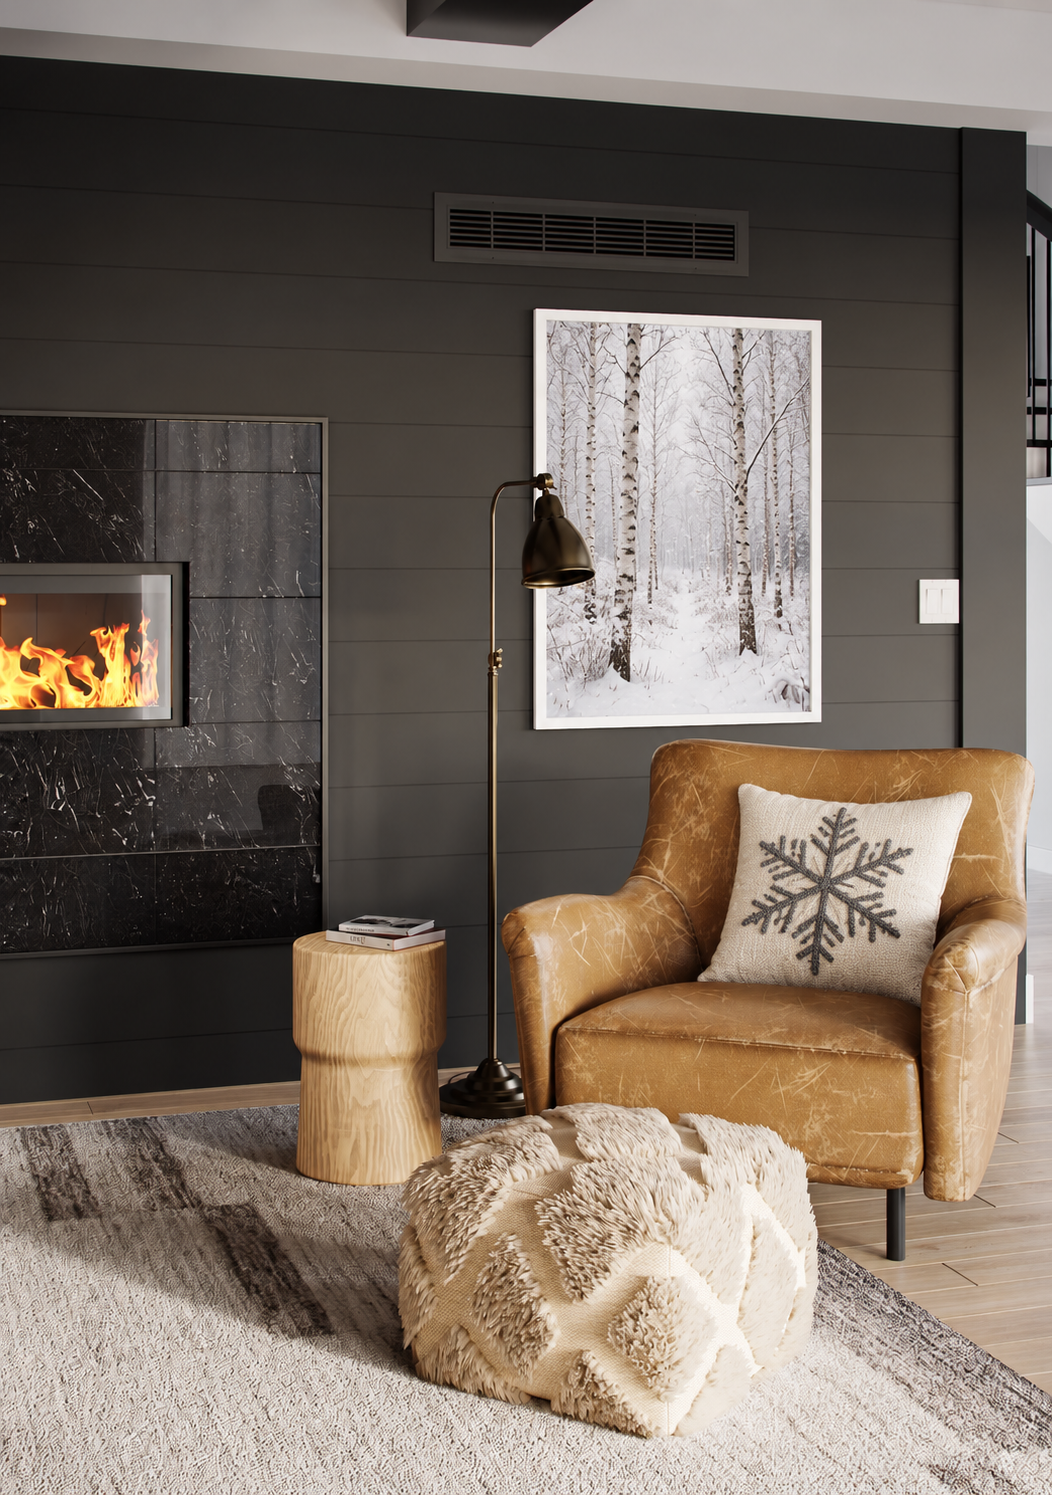
Snowy birch forest artwork and a snowflake pillow bring a seasonal touch to this living room designed by virtual interior designer Joshua Jones of JJones Design Co. The original rendering was adjusted using AI to illustrate holiday decorating ideas for this blog post.
4. Swap Everyday Wall Art for a Seasonal Print
Your walls offer another way to bring Christmas into a small room without taking over the floor or filling a tabletop. If you already have framed artwork, consider changing what’s inside a few frames for the season.
I like this idea because the room’s arrangement can stay familiar while the artwork changes its mood. A winter landscape above the sofa or a colorful holiday illustration in the dining area can become part of the decorating scheme without needing another surface to display it.
Choose Art That Fits Your Home’s Personality
Holiday artwork doesn’t have to mean a bright red sign or a print covered in Christmas lettering. Think about what you normally enjoy looking at, then find a seasonal interpretation.
For example:
If you love traditional interiors, consider a vintage-style botanical print of evergreen branches or a snowy village scene.
If your home is modern, try a graphic tree illustration, an abstract winter landscape, or a simple photographic print.
If you enjoy color and pattern, look for playful ornaments, folk art, or a festive illustration that picks up colors already in the room.
A winter landscape is especially useful if you’d like to keep the artwork up after Christmas. You can take down the more holiday-specific decorations while leaving that print in place through the colder months.
I’d choose something you enjoy beyond its ability to match the ornaments. Artwork gets a lot of attention in a small room, so it should feel like something you would want in your home.
Reuse Your Frames and Check the Opening Size
Before ordering a print, measure the visible opening in your frame or mat. The frame’s outer dimensions won’t tell you what size image you need, and a mat may cover part of the print’s edges.
For downloadable artwork, check the available aspect ratios and recommended print sizes. Choose a file that fits your frame without stretching the image or cropping away an important part of the composition. If you’re unsure, a print shop can help you select the right size and paper.
You can keep the everyday artwork safely stored while the seasonal print is on display. For an inexpensive paper print, storing it flat in a protective sleeve may be enough. Handle valuable, delicate, or professionally framed artwork according to its care requirements; I wouldn’t dismantle a special piece just to make a seasonal swap.
Change One Focal Piece or Part of a Gallery Wall
You don’t have to replace every picture in the room. One larger seasonal print may create all the change you need.
If you have a gallery wall, try swapping two or three pieces while keeping the frames and arrangement in place. Repeat a color or subject across the new prints so they relate to one another and to the artwork you’re keeping.
For example, a winter landscape, a close-up of evergreen branches, and a simple ornament illustration could work together without making every frame look identical.
Take a step back before changing anything else. If the wall already feels festive, you may find that the nearby console or table needs very little decoration.
Let the Artwork Connect the Holiday Look
Once you’ve chosen your print, use one or two of its colors elsewhere in the room. A burgundy detail in the artwork could connect to a pillow cover, while warm gold tones could echo ornaments on your wall tree.
That small connection helps the seasonal pieces feel at home with your furniture and everyday décor. You don’t need to match everything; a few repeated details are enough to give the room a sense of continuity.
Where this works best: A small living room, bedroom, dining area, or entryway with existing framed artwork and limited room for additional decorations.
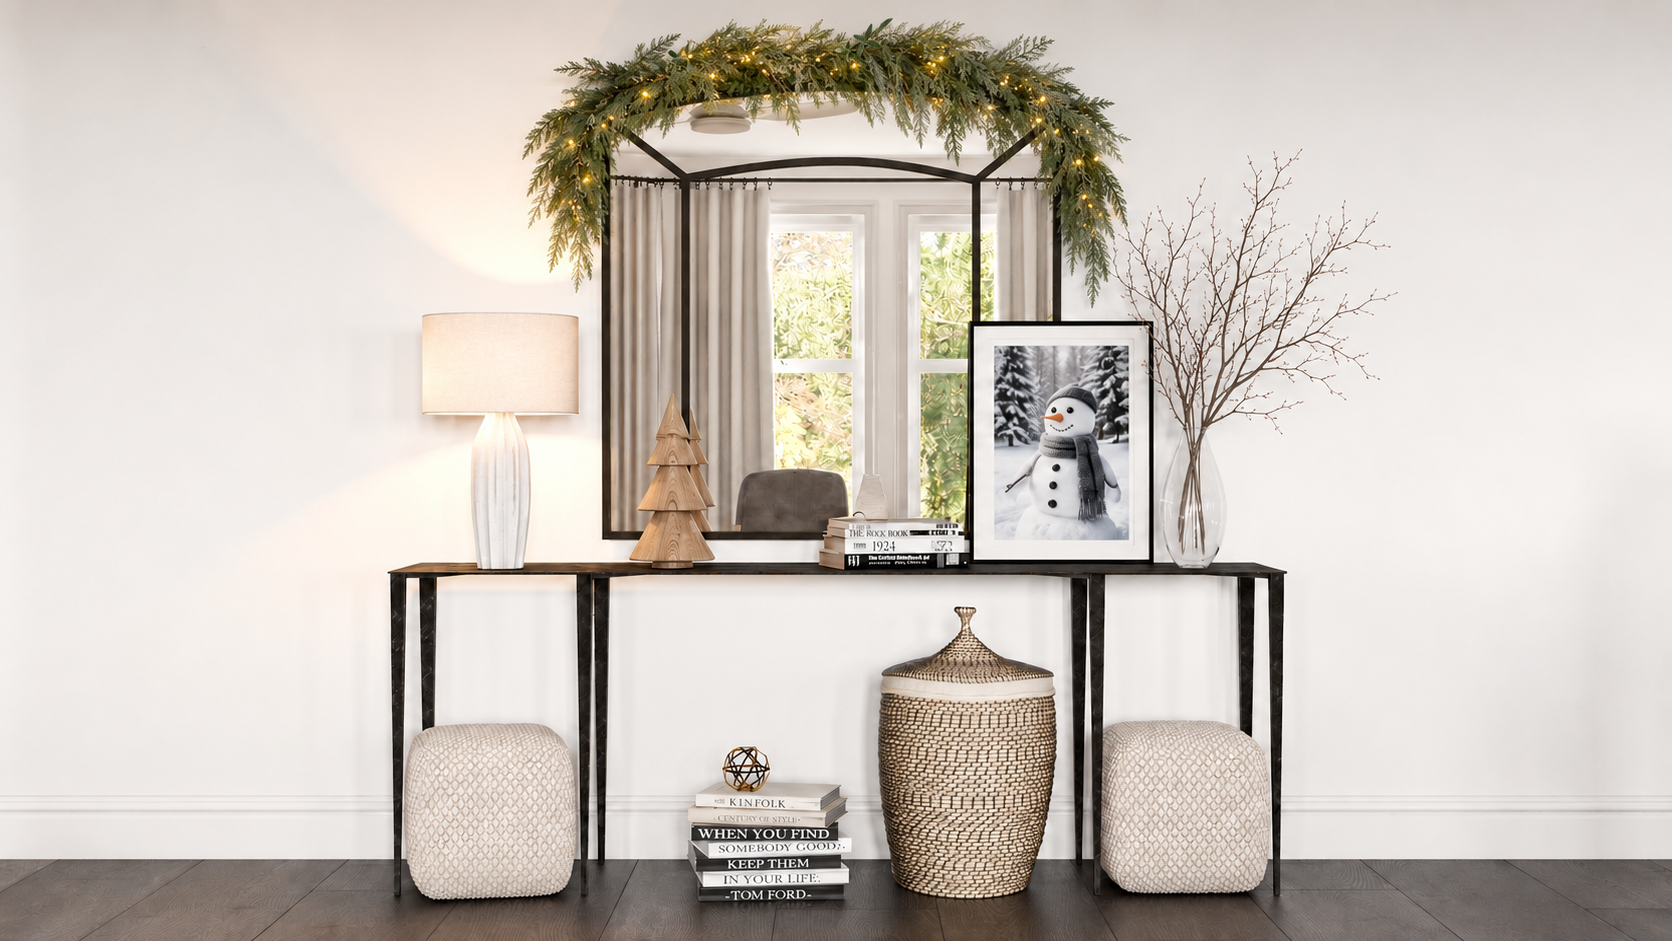
Lit weeping pine garland frames the mirror, while bare winter branches, snowman artwork, and a carved wood Christmas tree give this console a seasonal refresh. Original design by virtual interior designer Joshua Jones of JJones Design Co., adjusted using AI to illustrate holiday decorating ideas for this blog post.
5. Frame a Mirror or Window With Holiday Greenery
If you don’t have an open wall for a garland tree, look at the features already drawing your eye around the room. A mirror above a console or a window beside your dining table can provide a natural setting for holiday greenery.
I like decorating these areas because they give the greenery a clear shape to follow. You can create a noticeable seasonal change while keeping the furniture and surfaces below available for everyday use.
Let a Mirror Become the Holiday Focal Point
Try arranging garland along the top of a mirror, with a short section trailing down one side. This can look especially lovely on an arched or round mirror, where the greenery emphasizes part of the frame.
You don’t have to surround the whole mirror. On a smaller piece, a few evergreen sprigs and a ribbon at one upper corner may be enough. Leave most of the glass exposed so the mirror can continue reflecting light and serving its everyday purpose.
Choose ribbon that relates to your room: burgundy velvet for a rich, traditional look, striped fabric for something playful, or a simple woven ribbon for a softer arrangement.
Support the greenery with suitable hooks or attachment points rather than relying on the mirror frame to carry its weight. Avoid attaching adhesive directly to a delicate or decorative finish.
Use a Window as a Frame for Greenery
A window can give garland a strong outline without needing a mantel. You might run a lightweight strand across the top, allowing the ends to fall a little way down each side.
Before hanging it, open and close the window and move the curtains or shades through their full range. Position the greenery where it won’t interfere with handles, curtain movement, ventilation, or an emergency exit.
I’d also consider how much daylight the room gets. In a small room with limited natural light, keep the arrangement airy and leave the glass mostly clear. A thick border of greenery may feel heavier than you expect once it’s in place.
Hang a Few Ornaments Where You Can Enjoy Them
For another approach, suspend a small group of lightweight ornaments on ribbons at different heights in front of the upper portion of the window. This creates a display you can appreciate from inside, with very little depth.
Choose a few ornaments with interesting shapes or translucent finishes rather than filling the entire window. The open spaces between them are part of the arrangement.
Use secure attachment points appropriate for the weight and surface, and keep hanging ribbons out of reach of children and pets. Make sure the ornaments won’t knock against the glass when curtains move or the window opens.
Decide Which Feature Gets the Attention
If a mirror and window are close together, I’d usually decorate one first and see how the room feels. Both don’t necessarily need a full garland treatment.
For example, greenery around the mirror might be enough, with just a few hanging ornaments at the window. That gives each feature a different role and keeps the room from feeling covered in decorations.
This can also be your main holiday display if you’re skipping a tree altogether. Give it a little care in the placement, choose decorations you love, and let it hold the attention.
Where this works best: A small entryway with a wall mirror, a dining nook beside a window, or a living room where open wall space is limited.

Holiday pillows and an oatmeal throw refresh the sage green sofas, complemented by mantel greenery and bare birch branches. Original living room design by virtual interior designer Joshua Jones of JJones Design Co., adjusted using AI to illustrate holiday decorating ideas for this blog post.
6. Refresh Your Sofa With Seasonal Pillow Covers and a Throw
If your sofa already has pillows and a blanket, you have another place to bring in Christmas without adding to the room’s footprint. Changing the covers and swapping the throw can give your seating area a seasonal refresh while keeping the number of pieces the same.
I’d keep this simple, especially if you’ve already decorated a wall, bookshelf, or tree nearby. Your sofa can pick up a few colors from those displays without becoming another elaborate arrangement.
Change the Covers, Keep the Inserts
Before shopping, check the dimensions of your existing pillow inserts and the sizing guidance for the covers you’re considering. Reusing inserts saves storage space after the holidays, since empty covers are easier to fold and put away than complete pillows.
You might replace one or two covers rather than the entire set. A patterned holiday pillow can work alongside a solid cover you already own, particularly when they share a color.
Think about how you use the sofa, too. If you regularly move pillows out of the way to sit down, I wouldn’t add more for Christmas. Choose a few comfortable pieces that can stay in place while you relax.
If you’d like help choosing pillow sizes or combining patterns, my throw pillow styling guide walks you through creating an arrangement that looks balanced and leaves room to sit comfortably.
Bring in the Season Through Color and Texture
You don’t need Christmas motifs on every pillow. Burgundy velvet, forest green woven fabric, or a plaid cover can suggest the season while still fitting the room’s everyday style.
If your holiday artwork has a distinctive palette, this is a good place to repeat one of its colors. A blue-and-white winter print might pair beautifully with a deep blue pillow and a soft ivory throw. A colorful ornament illustration could inspire a brighter combination.
I’d choose one patterned piece first, then work with simpler fabrics around it. This gives the pattern room to be noticed and makes it easier to mix seasonal covers with what you already have.
Choose a Throw You’ll Actually Use
Swap your everyday blanket for one that brings in a seasonal color or texture, then place it where you normally reach for it. Fold it over the sofa arm or drape it across the back of a chair, keeping it clear of the floor and nearby walkways.
Comfort matters here. A beautiful throw that feels scratchy or needs more care than you want to give it probably won’t become a favorite. Check the fabric and washing instructions, particularly if you share the sofa with pets.
A plaid, knitted, or textured blanket can stay useful well beyond Christmas. If you’d rather avoid storing another seasonal item, choose one you’ll enjoy throughout winter.
For more ways to fold, drape, and place your blanket, see my guide to decorating with throw blankets. You can use those same styling ideas with a seasonal throw, then switch back whenever you’re ready.
Where this works best: A small living room or studio apartment where the seating area can carry a little holiday color without needing extra display space.

Seasonal pillows, winter artwork, and a few Christmas accents bring holiday warmth to this living room while leaving room for everyday life. Original design by virtual interior designer Joshua Jones of JJones Design Co., adjusted using AI to illustrate holiday decorating ideas for this blog post.
A Festive Home With Room to Live
You don’t need to use every idea in this guide to make your home feel ready for Christmas. Choose the one that solves your biggest space challenge, then see what else the room needs.
If there’s nowhere practical for a tree, a garland tree on the wall could become your main display. If your shelves already hold pieces you love, a few seasonal swaps might be enough. Holiday artwork and a comfortable winter throw can bring the mood into a room where you’d prefer to keep decorating simple.
Before adding anything else, spend a little time using the space. Sit on the sofa, pull out a dining chair, and walk through the room as you normally would. Notice whether your decorations are easy to enjoy or whether you keep moving them out of the way. That will tell you more than a perfectly styled photograph.
What I want for your home is a holiday look that feels personal and lets you enjoy being there. Keep the ornaments that mean something to you, choose a few places where they can shine, and give yourself permission to leave other areas as they are.
If the room feels crowded throughout the year, my guide to making a small room look bigger without knocking down walls is a helpful next step. It looks at the layout, proportions, and everyday design choices that can make a compact room more comfortable.
And if you’d like help working out a layout and choosing pieces for your own space, I offer virtual interior design. We can create a plan around your room, your style, and the way you live in it.
Which idea could you picture in your home—the garland wall tree, a tall slim tree, or seasonal artwork in your existing frames? Tell me in the comments. If someone you know is wondering where their Christmas decorations will fit this year, send this guide their way.